draw-line, which takes two vectors representing the start and end points of the line and draws a line between those points.When I originally did the exercises in this section I didn't worry myself too much about this. After all, some of the exercises rely upon the existence of procedures that aren't addressed until later exercises, so I wouldn't necessarily be able to produce sensible pictures for each exercise until I'd completed them all.
Of course now I'm writing up the exercises after the fact, and have a full picture language at my disposal. So I decided I'd produce at least an implementation of
draw-line that would allow me to produce some pictures to post in the exercises as I write them up.I've noted before that one of the interpreters I'm using is DrRacket, which has its own graphical interface toolkit. After a bit of head-scratching and hitting the docs, here's what I came up with:
#lang racket
(require racket/gui/base)

(define picture-size 300)

(define bitmap
  (make-object bitmap% (+ picture-size 1) (+ picture-size 1)))

(define bitmap-dc
  (new bitmap-dc% [bitmap bitmap]))

(define frame
  (new frame% [label "SICP Picture Language"]))

(define canvas
  (new canvas%
     [parent frame]
     [min-width (+ picture-size 1)]
     [min-height (+ picture-size 1)]
     [paint-callback (lambda (canvas dc)
                       (send dc draw-bitmap bitmap 0 0))]))

(define (draw-line start end)
  (send bitmap-dc
        draw-line
        (xcor-vect start)
        (ycor-vect start)
        (xcor-vect end)
        (ycor-vect end)))

(define window (make-frame (make-vect 0 picture-size)
                           (make-vect picture-size 0)
                           (make-vect 0 (- 0 picture-size))))

(send frame show #t)
You'll need the vector constructor and selectors from exercise 2.46 and the same for one of the frame representations from exercise 2.47 for these to work.Note that
window provides a frame that will map a picture with x and y coordinates in the ranges [0..1] into the [0..picture-size] that's provided. It needs to map standard Cartesian coordinates into an inverted coordinate system as, like many windowing systems, the coordinates (0, 0) correspond to the top-left corner of the window, as opposed to the bottom-left as is used by the picture language.We can also give ourselves a shape to play with. I'm using a procedure I produced as part of exercise 2.49,
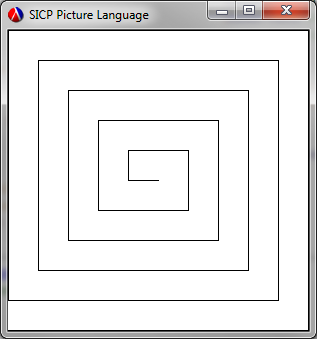
build-segments-list, that basically takes a list of vectors and turns those into a list of segments. I've used this to produce a spiral:
(define spiral
  (segments->painter (build-segments-list (make-vect 0.0 0.0)
                                          (make-vect 1.0 0.0)
                                          (make-vect 1.0 1.0)
                                          (make-vect 0.0 1.0)
                                          (make-vect 0.0 0.1)
                                          (make-vect 0.9 0.1)
                                          (make-vect 0.9 0.9)
                                          (make-vect 0.1 0.9)
                                          (make-vect 0.1 0.2)
                                          (make-vect 0.8 0.2)
                                          (make-vect 0.8 0.8)
                                          (make-vect 0.2 0.8)
                                          (make-vect 0.2 0.3)
                                          (make-vect 0.7 0.3)
                                          (make-vect 0.7 0.7)
                                          (make-vect 0.3 0.7)
                                          (make-vect 0.3 0.4)
                                          (make-vect 0.6 0.4)
                                          (make-vect 0.6 0.6)
                                          (make-vect 0.4 0.6)
                                          (make-vect 0.4 0.5)
                                          (make-vect 0.5 0.5))))
We can then display our spiral... Invoking this:
(spiral window)Produces this:
 Now with that done we can actually get on to the exercises themselves.
No comments:
Post a Comment